Let's Workshop: 4x3 Matrix Membrane Keypad
Posted by Sebastian Karam on
Here is a quick introduction to using a 4x3 Matrix Membrane Keypad. Hopefully it will provide you with the confidence include a keypad in your next Arduino project.
This example will demonstrate the use of an Arduino UNO polling the keypad for key presses. Once connected and the program loaded, the display will poll the keypad and relay the result to the serial monitor. This will use the Keypad library created by Mark Stanley and Alexander Brevig.
Components
- 1pcs Arduino UNO or Compatible - LCAA100005
- 1pcs 4x3 Membrane Matrix Keypad Module - BLAA100152
- 7pcs Male to Male Jumper Cables - GBAA100001
Wiring
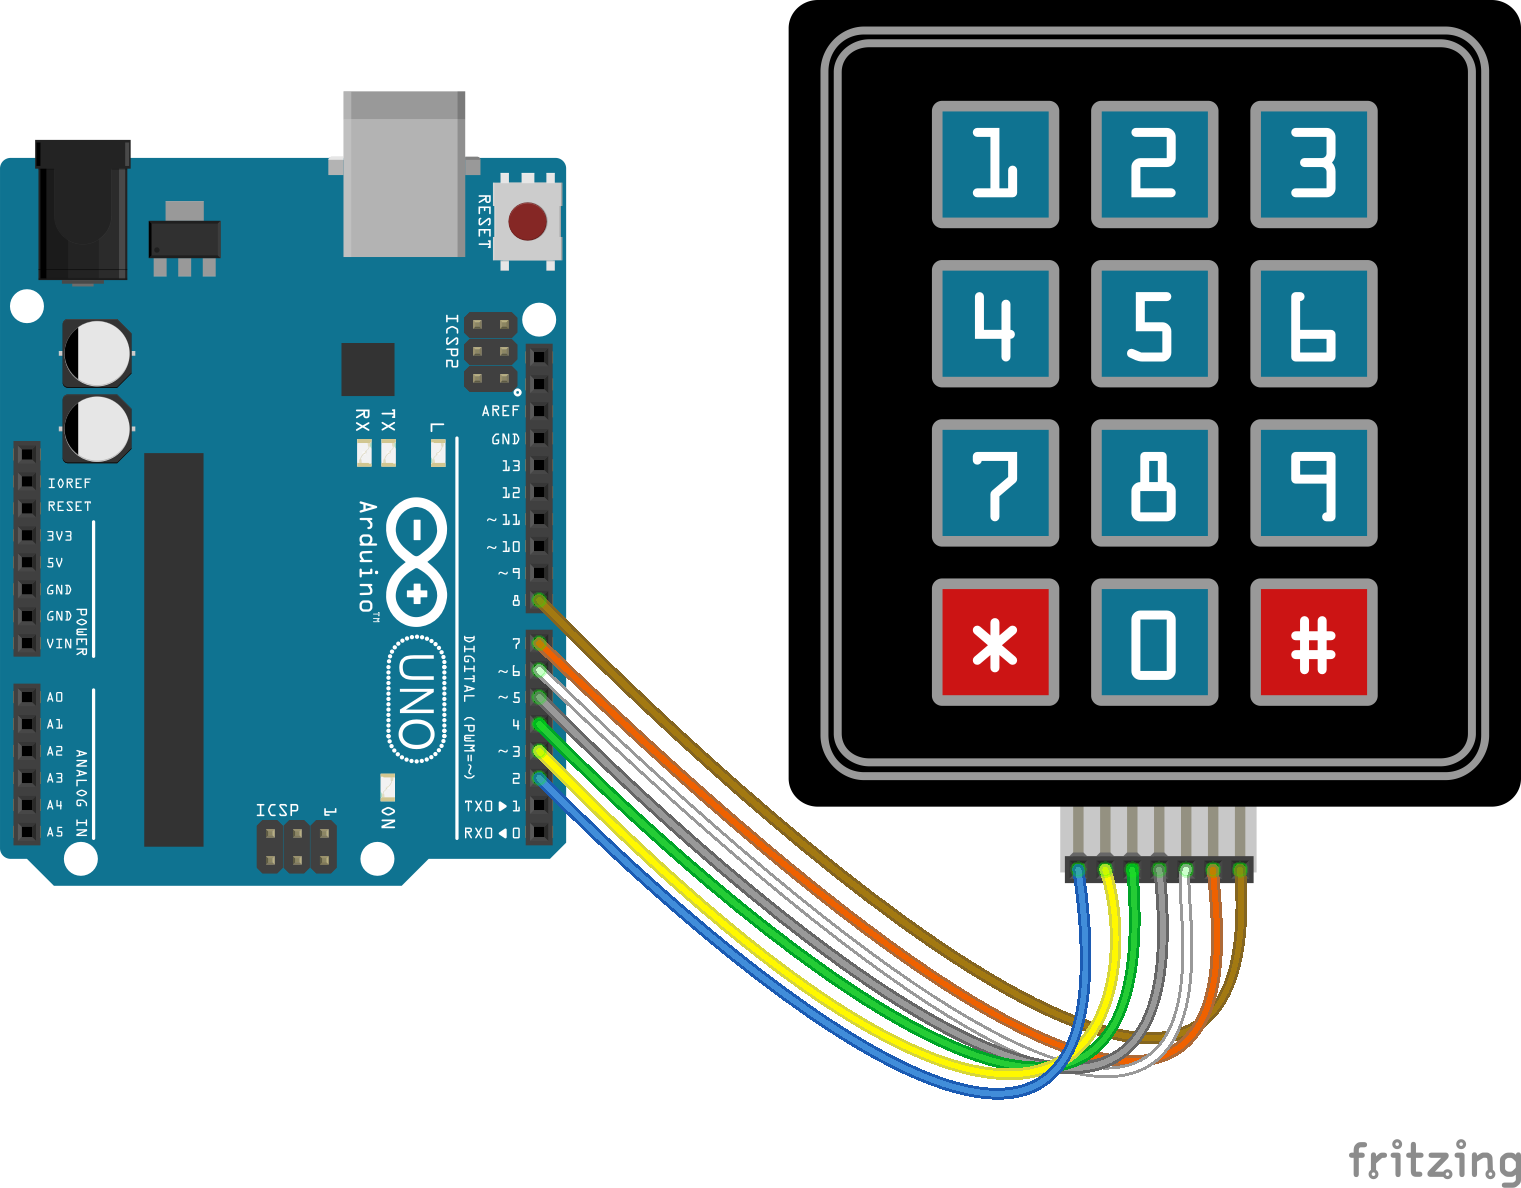
Wire the keypad and board together as can be seen in the image below, taking care to match the pin numbers.
Coding
The code consists of the an include, definitions, initialisation, setup and loop. First the Keypad library is linked to the code. This is followed by a row and column quantity and an array definition that will be used to specify the key values in the keypad object. Next the pins associated with the keypad are defined. Using the information entered the keypad object is established through the linked library. A simple setup launches the serial connection to allow information to be relayed to the serial monitor in the IDE. The loop contains the control program that will run continuously after the setup. At the top the keypad object is polled for any entered key. This is followed by two conditional 'if' statements that write to the serial monitor. The first returning the key pressed, when a value is available in the 'key' variable. The second returning a string when a specific value is held in the 'key' variable.
Load the code below into the Arduino IDE and upload it to your board.
/* A simple program designed to setup and demonstrate the Keypad library and 4x3 Matrix Membrane Keypad Module - BLAA100152 The program uses the Keypad library to monitor the keypad for presses, on detecting a press it relays it to the serial monitor. modified 21 March 2019 by Sebastian Karam - Flux Workshop The Keypad library created by Mark Stanley, Alexander Brevig https://github.com/Chris--A/Keypad */ #include// include the Keypad library const byte ROWS = 4; // define 4 rows const byte COLS = 3; //define 3 columns char keys[ROWS][COLS] = { // build a character array that will be assigned to the keypad object {'1','2','3'}, {'4','5','6'}, {'7','8','9'}, {'*','0','#'} }; byte rowPins[ROWS] = {2, 3, 4, 5}; // define the pins attached to the rows byte colPins[COLS] = {6,7,8}; // define the pins attached to the columns Keypad keypad = Keypad( makeKeymap(keys), rowPins, colPins, ROWS, COLS ); // create a keypad object with the information provided earlier void setup(){ Serial.begin(9600); // launch the serial monitor } void loop(){ char key = keypad.getKey(); // poll the keypad object for a keypad press if (key){ // an 'if' that checks if a value has been obtained from the poll Serial.println(key); // perform a function if a key press has been found - in this case print the value to the serial monitor } if (key =='#'){ // an 'if' that looks for a particular value in the 'key' variable - in this case # Serial.println("FLUX"); // perform a function if a key press has been found - in this case print a string to the serial monitor } }
Running
With the board loaded with the program and all the connections made, open the serial monitor through the IDE and observe. In the demo below, the keys on the key pad are pressed in sequence. Each key press returns a value to the screen as the first program 'if' is entered. Note when the '#' key is pressed both the 'if' statements are triggered and printed to the screen.

What to try next?
- Integrate the keypad into an existing project to allow buttons to trigger specific program functions.
- Investigate the use of interrupts to remove the need for polling