Let's Workshop: 6 Status LED Module
Posted by Sebastian Karam on
Here is a quick introduction to using the 6 LED status module. Hopefully it will provide you with the confidence include a display in your Arduino project and see its usefulness in debugging programs.
This example will demonstrate the use of an Arduino UNO in controlling the module. Once connected and the program loaded, the display will cycle through all the LEDs.
Components
- 1pcs Arduino UNO or Compatible - LCAA100005
- 1pcs 6 Status LED Module - BBAA100008
Wiring
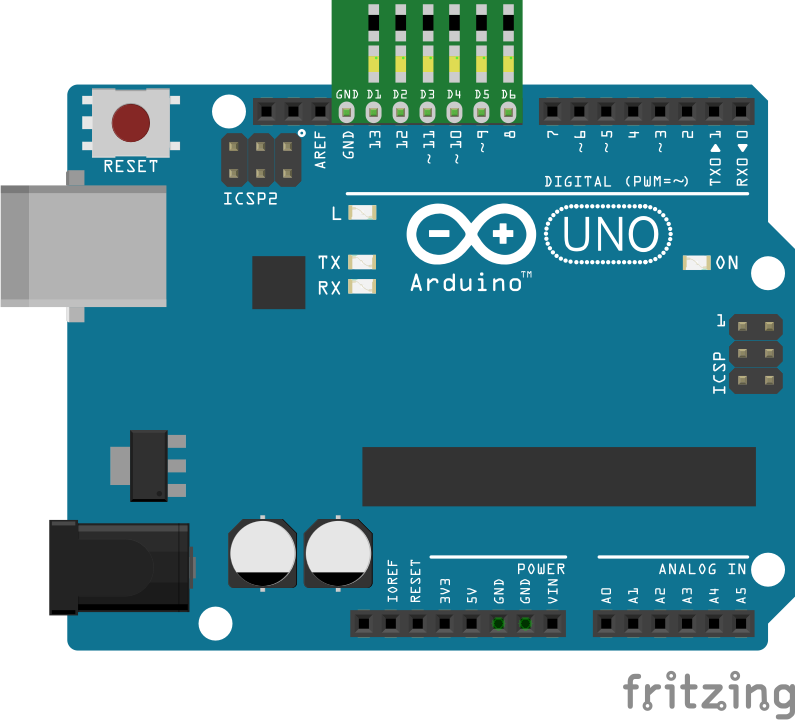
Wire the two boards together as can be seen in the image below, taking care to match the pin numbers.
Coding
The code consists of the a setup and single loop. The setup defines the pins to be used in the control of the module. The loop contains the control program that will run continuously after the setup. The loop cycles through each of the LEDs toggling it from it's current state to the next.
Load the code below into the Arduino IDE and upload it to your board.
/*
  A simple program designed to setup and demonstrate the 6 status LED module - BBAA100008

  The program selects LEDs in order and lights it.

  modified 24 May 2019
  by Sebastian Karam - Flux Workshop
*/

// these constants won't change:
const int pinCount = 6;    // the number of LEDs in the display
int LEDpin[] = { 8, 9, 10, 11, 12, 13 };   // an array of pin numbers to which LEDS is attached

void setup() {
  for (int thisLED = 0; thisLED < pinCount; thisLED++) {  // loop over the LED pin array and set them all to outputs
    pinMode(LEDpin[thisLED], OUTPUT);
    digitalWrite(LEDpin[thisLED],LOW);
  }
}

void loop() { // the loop function runs over and over
  for (int thisLed = 0; thisLed < pinCount; thisLed++) {
     digitalWrite(LEDpin[thisLed],!digitalRead(LEDpin[thisLed])); // toggles the LED
     delay(100);
  }
}
Running
With the board loaded with the program and all the connections made the display will begin to cycle through all the LEDs in the module. The output should be as seen below. Please note the camera has a hard time dealing with bright LEDs.
What to try next?
- Toggle a pin from within another piece of code - to show you where you are in the program.
- Use the LEDs to build a VU spectrum audio display