Let's Workshop: LC Technology RW1820 Temperature Sensor Module
Posted by Sebastian Karam on
Here is a quick introduction to using the LC Technology RW1820 temperature module. We aim to provide you with the tools you require to start measuring temperatures.
This example will demonstrate the use of an Arduino UNO in requesting and interpreting data from a RW1820 sensor module. Once connected and the first program loaded, the serial monitor will display a live temperature readout. This will use the OneWire library created by Paul Stoffregen and the DallasTemperature library created by Miles Burton.
Components
- 1pcs Arduino UNO or Compatible - LCAA100005
- 1pcs LC Technology RW1820 Temperature Sensor Module - BDAA100146
- 3pcs Male to Female Jumper Cables - GBAA100002
Wiring
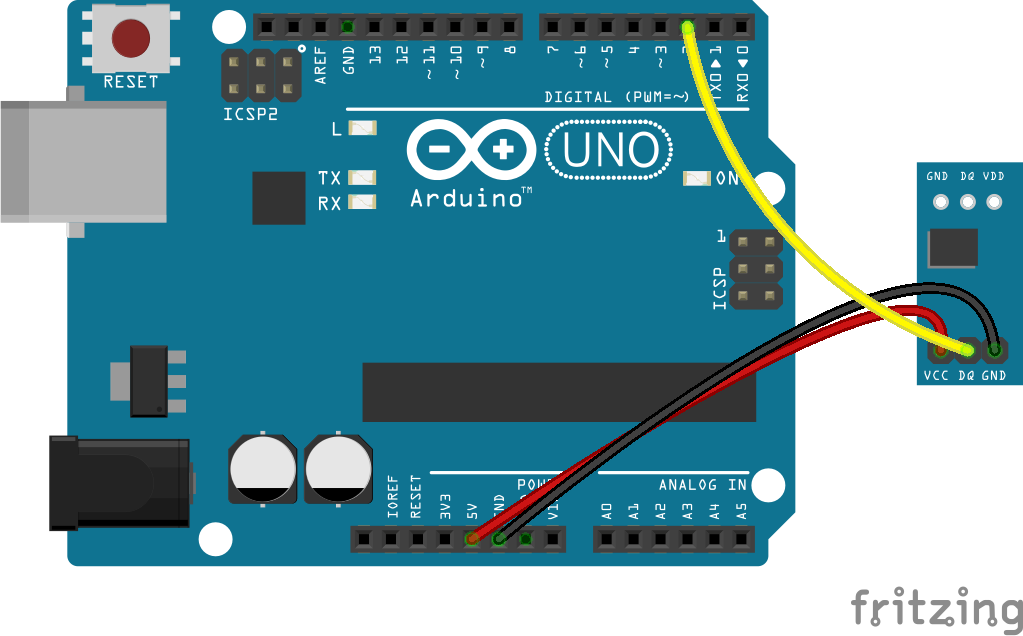
Wire the two boards together as can be seen in the image below, taking care to match the pin numbers.

Coding
The code consists of the an include, definition, launch, setup and loop. First the OneWire library and the DallasTemperature library are linked to the code. The sensor pin is defined followed by the OneWire library and DallasTemperature library instances established. The setup launches the serial connection and sensor connection. The loop contains the control program that will run continuously after the setup. It begins by requesting the information from the sensor instance. It then prints the value to the serial monitor.
Load the code below into the Arduino IDE and upload it to your board.
/* A simple program designed to setup and demonstrate the DallasTemperature library and RW1820 TEMPERATURE SENSOR MODULE - BDAA100146 The program uses the OneWire and DallasTemperature libraries to request and ouput temperatures from a RW1820 sensor to the serial monitor. modified 15 February 2019 by Sebastian Karam - Flux Workshop The OneWire library created by Paul Stoffregen https://github.com/PaulStoffregen/OneWire The DallasTemperature library created by Miles Burton https://github.com/milesburton/Arduino-Temperature-Control-Library */#include <OneWire.h>
#include <DallasTemperature.h> // Define the pin that the sensor pin #define ONE_WIRE_BUS 2 // Establish a oneWire instance OneWire oneWire(ONE_WIRE_BUS); // Establish Dallas Temperature instance DallasTemperature sensors(&oneWire); void setup(void) { Serial.begin(9600); // Open a serial communication line sensors.begin(); // Start up the DallasTemperature library } void loop(void){ sensors.requestTemperatures(); // Request temperatures from the sensors instance Serial.print("Temperature (Celcius): "); // Print to the serial monitor Serial.print(sensors.getTempCByIndex(0)); // Print the temperature from the library to serial monitor Serial.print("\n"); // Print to the serial monitor delay(1000); // Pause before restarting the loop }
Running
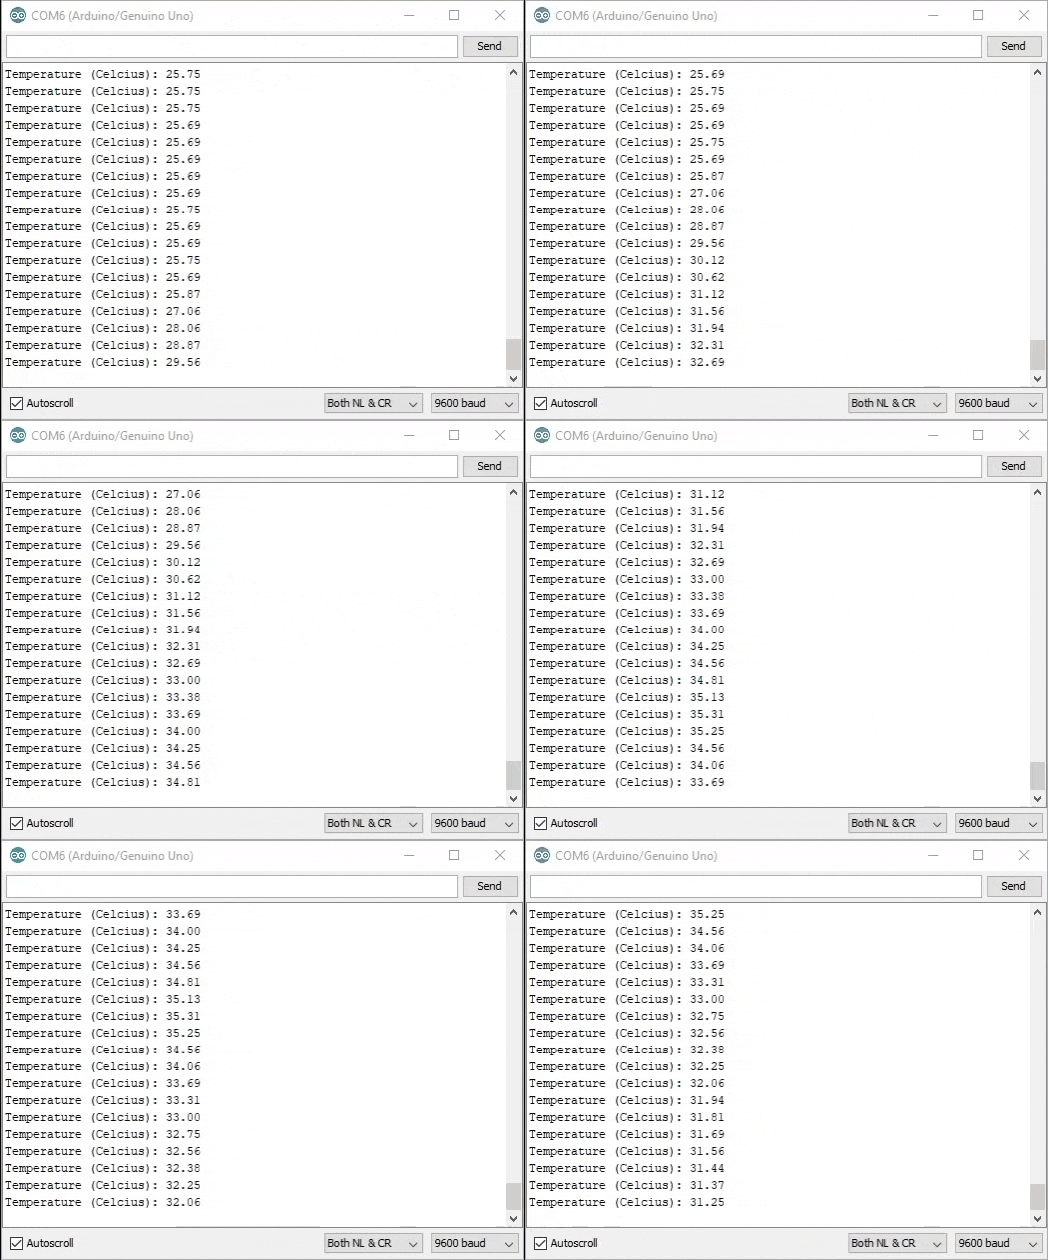
With the board loaded with the program and all the connections made the module will begin to output a temperature in Celsius. The animation below shows a brief loop of the sensor being placed under a hot cup of water.

What to try next?
- Using multiple temperature sensors - changing the number "0" in "sensors.getTempCByIndex(0)"
- Use the DallasTemperature library to produce the output in Fahrenheit.
Share this post
- 42 comments
- Tags: Arduino, BDAA1000146, BDAA100174, DallasTemperature, LC Technology, Onewire, Sensor, Temperature, UNO

It doesn’t show the real temperature and keeps showing “Temperature (Celcius): -127.00” with no change. What did I do wrong?
i get only -127 and it doesn’t matter if the tempsens is in or out :(
tadalafil 25mg tadalafil dosage tadalafil side effects
how long does tadalafil last tadalafil uses tadalafil research powder
tadalafil cost walmart tadalafil peptide tadalafil liquid